[WSO2 Open Source Enterprise Solutions] Cloud to enterprise integration
Products: WSO2 ESB 5, ESB Tooling, WSO2 WUM, WSO2 DSS
Tags: Data Mapper Mediator, WSO2 Update Manager, Salesforce Connector, Batch Requests.
ABSTRACT
With the expansion of any organization, they will adopt external systems to be used in their day to day operations. There are many external application that can be adopted for, such as Salesforce for sales, Pardot for marketing, People-HR for managing human resource and Netsuit for finance...etc. Also each of these system contains more data related to different processes/systems. At some point your organization need to extract those data for your own application(s) or to build a central database to do overall analysis of your organization by correlating those data. This article will demonstrate how to extract those data and how to present those using WSO2 products.
Products: WSO2 Update Manager(WUM 1.0 Beta), WSO2 Enterprise Service Bus(ESB 5.0), ESB Tooling, WSO2 Data Services Server (DSS 3.5.0) and WSO2 Dashboard Server(DS 2.0).
Architecture Diagram

Figure 1.0.0: Architecture Diagram.
[Note: This Tutorial will only covers up-to step 4 from the above diagram. Will cover the rest and more from the next tutorial. ]
Salesforce Configurations
Step A: Creating Salesforce Account and retrieving security token.
[Note: Initially you will receive security token to your email otherwise you can obtain new security token by following steps.]
Getting your the security token.
- Go to your settings.

- Enter ‘Reset’ in the search box.

- By clicking Reset My Security Token you can reset it and the new security token and it’ll be send to your email.

- Check your mailbox.

Downloading and Updating WSO2 Products
Downloading and updating WSO2 products are pretty much easier with WSO2 Update Manager (WUM). You can update your software to the latest set of released updates, or schedule it to run periodically so you maintain the latest set of updates continuously.
- WSO2 Update Manager
- Download WUM - Download Link
- [Note: ESB 5.0 and Tooling required some updates that will be used by this tutorial]
- Download DSS - Download Link
- Download DS - Download Link
- Download Salesforce Connector - Download Link
MySQL database configurations.
First we need a database and a table to store the data, let’s create it first.
[Note : I have create the following database and the table for the demonstration purposes.]
- Create a Database : salesforce.
- Create a Table in it: SF_Account.
CREATE TABLE `SF_Account` (
`AccountId` varchar(45) NOT NULL,
`Name` varchar(999) DEFAULT NULL,
`CreatedDate` datetime DEFAULT NULL,
`year` int DEFAULT NULL,
`Month` int DEFAULT NULL,
`Date` int DEFAULT NULL,
PRIMARY KEY (AccountId)
) ENGINE=InnoDB DEFAULT CHARSET=latin1;
Step 3
Adding MySQL Connector to DSS
- Unzip and copy the mysql-connector jar file into the DSS Home -> repository -> components -> lib folder.
[Note: If you already start the server, Shutdown the server before copying and start after.]
DSS Configurations
- Login to the DSS admin console.
- Go to Configure - > Datasources -> Add Datasource.

For the ‘Name’ you can give any name.
Driver: com.mysql.jdbc.Driver
URL: jdbc:mysql://localhost:3306/ [change ip and the port accordingly]
[Note: I here we are creating something like a global datasource, which can be access by multiple services. You can also create specific datasource for each service when creating the service.]
Creating Data Service
Now we have the datasource configured, let’s create the service.
[Note : When creating the services, generating will be much easier to do, because when you have many tables and many entries on those tables, mapping it manually, take time.]
- Go to DSS Main menu.
- Under the Data Service, Click Generate.
- Select the Carbon Datasource (which we have created in the previous step).
- Give your the database name (in here salseforce).
- Click ‘Next’.

- Now select your table.

- Click ‘Next’.
- Now select , ‘Single Service - Creates one service for all selected tables’.
[Note: This will create one service for the table you have selected. If you have multiple table selected, you can have specific service created for each table or one service for all table. In this scenario it doesn’t make any different because we only have one table.]
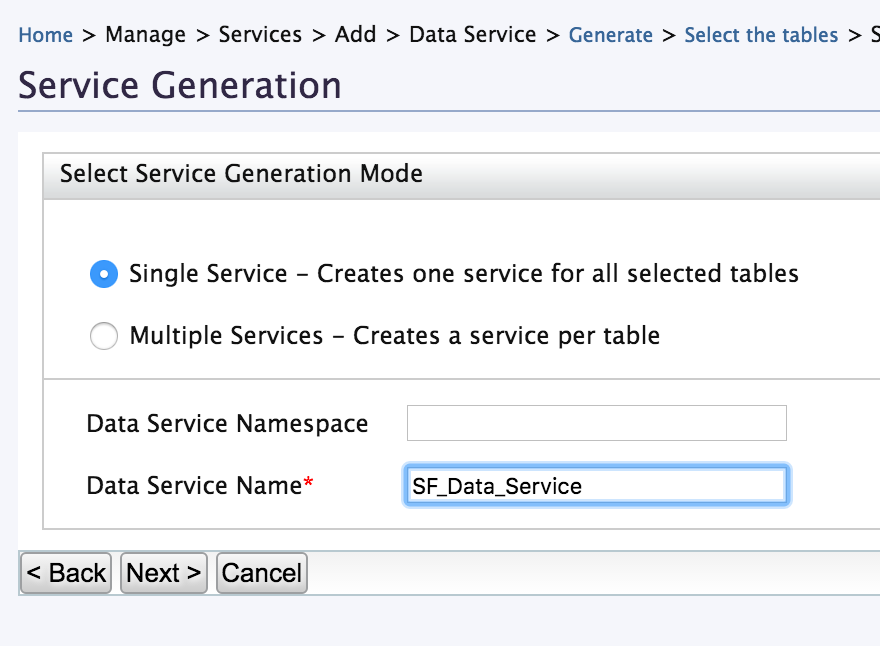
- Click ‘Next’.

- Click Finish.
If you go to list of services, you could see the service that you have created.

- Click on the service name ‘SF_Data_Service’.
Service Dashboard (SF_Data_Service)
In here you can see the ‘Client operations’. Those endpoints will be use in the ESB configurations.
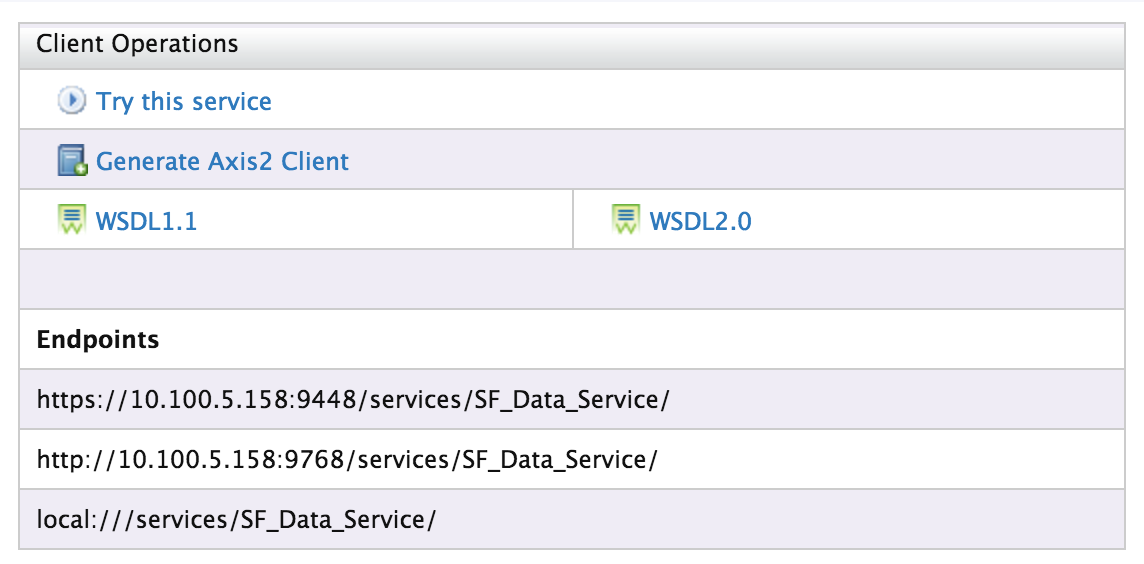
If you click on, Try this service. You see all the service methods available for the service.

In the previous window (Service Dashboard), under the Specific Configurations.
- Click on ‘Edit Data Service (Wizard)’

You can see the ‘Data Service Namespace’ which will be use in the ESB configurations.

- Check ‘Enable Batch Requests’
[Note: We need to do batch requests because, the applications like Salesforce contains lot’s of data, sending lots of request to the services and to the database is not a good approach]
When you go forward by clicking ‘Next’, you can see the automatically created queries and also the operations.
[Note: You can delete the unwanted queries, but before that, make sure to delete the operation first, which is mapped with the query by clicking next.]

Now the DSS Configurations are complete.
ESB Tooling implementations.
Step 1 & 2
- Open ESB Tooling
- Right Click on Project Explorer, select New -> ESB Solution Project

- Give a Project Name. Others will fill automatically and leave it like that.
In this demonstration we need,
- Registry resource project to configure the data mapping mediator.
- Connector Exporter Project to export the Salesforce connector to ESB.
- Composite Application (C-App) Project to deploy the application.

- Click Next.
- Give a Group Id, Artifact Id and a version for the project.

- Click Finish.
You will have four separate project as follow.

Before start implementation, I would like to add the Salesforce connector to the Connector Exporter project and finalize it.
- Right click on connector exporter project.
- Click on New -> Add/Remove Connectors.

- Select Add Connector.

- Browse it from your File System and Click Finish.
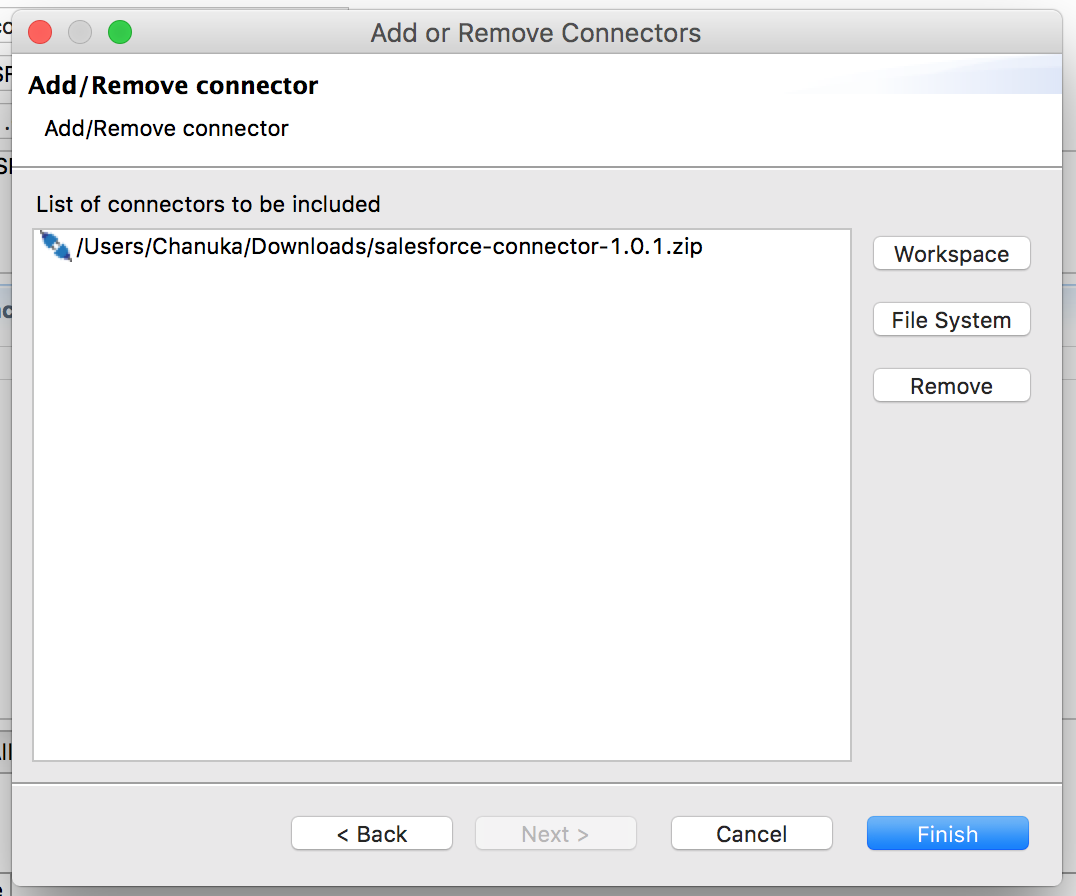
Ok now connector exporter project is complete.
Let’s add the connector to the ESB Configuration project. We will need it when doing the implementations.
- Right click on SF Configuration project.
- Select Add or Remove connector.


- Select Add connector.

- Give Connector location and click Finish.
Let’s create a local entry to store our Salesforce credentials.
- Right click on the SF Config project -> New -> Local Entry.


In here your password should be,
Your password + your security token (Eg: ye8rnaSA8aUibGhH2HdKY0ZdsSpHz46F) [No spaces]
Sample ‘Value’
<?xml version="1.0" encoding="UTF-8"?>
<localEntry xmlns="http://ws.apache.org/ns/synapse" key="sf_auth">
<salesforce.init> <loginUrl>https://login.salesforce.com/services/Soap/u/36.0</loginUrl>
<username>xxxxxxxxxxxxxxxxxxxx</username>
<password>xxxxxxxxxxxxxxxxxxxx</password>
<blocking>true</blocking>
</salesforce.init>
</localEntry>

- Click Finish.
Let’s implement the proxy now.
- Right Click on the project. Click New -> Proxy Service

- Click Add New.

- Give a Name -> Finish.

You will see the initial window like below.

Go to source view.

Replace the default code with the following code.
<?xml version="1.0" encoding="UTF-8"?>
<proxy name="SF_Proxy" startOnLoad="true" transports="http https" xmlns="http://ws.apache.org/ns/synapse">
<target>
<inSequence>
<salesforce.query configKey="sf_auth">
<batchSize>200</batchSize>
<queryString>SELECT CreatedDate,Id,Name FROM Account</queryString>
</salesforce.query>
<iterate xmlns:sfdc="http://wso2.org/salesforce/adaptor"
expression="//sfdc:iterator"
sequential="true">
<target>
<sequence>
<property name="salesforce.query.queryLocator"
expression="get-property('operation','opt.salesforce.query.queryLocator')"
type="STRING"/>
<log level="custom">
<property name="Before ......................"
expression="$ctx:salesforce.query.queryLocator"/>
</log>
<salesforce.queryMore>
<batchSize>200</batchSize>
</salesforce.queryMore>
<property name="opt.salesforce.query.queryLocator"
expression="$ctx:salesforce.query.queryLocator"
scope="operation"
type="STRING"/>
<log level="custom">
<property name="After ......................"
expression="$ctx:salesforce.query.queryLocator"/>
</log>
</sequence>
</target>
</iterate>
</inSequence>
<outSequence>
<send/>
</outSequence>
<faultSequence/>
</target>
</proxy>
- Save it.
Now we need to deploy the configurations in the ESB. Let’s create the C-App for that.
Since the C-App project is already created let’s add the deployment artifacts for that.
- Double click on the pom.xml file of the C-App project.
You will see the following window.
- Check on the related projects and save.

Let’s add the ESB remote server and deploy the C-App.
- Right click on the ‘Server’ tab window.
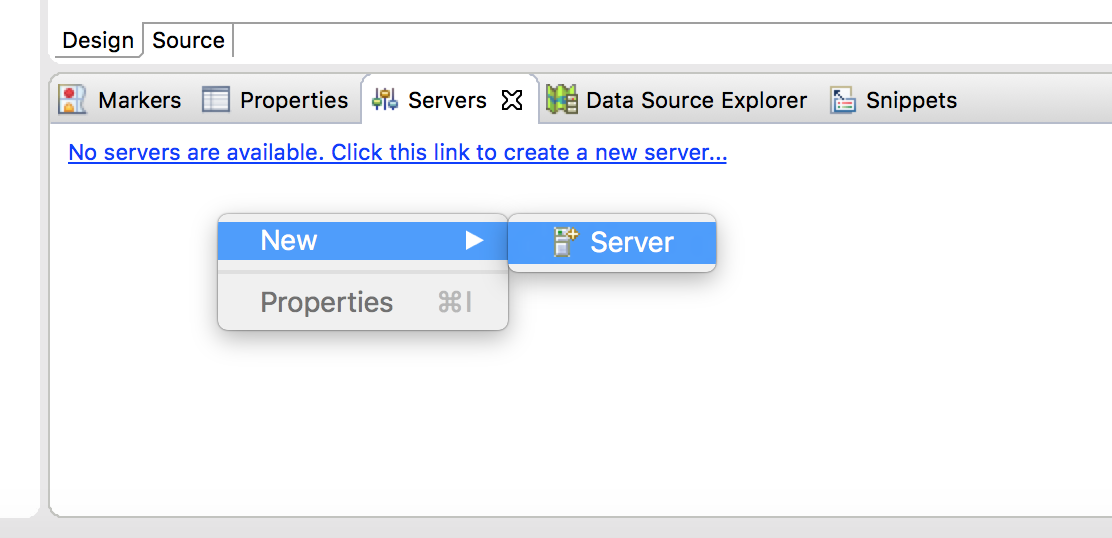
- New -> Server.
- Select WSO2 remote server.
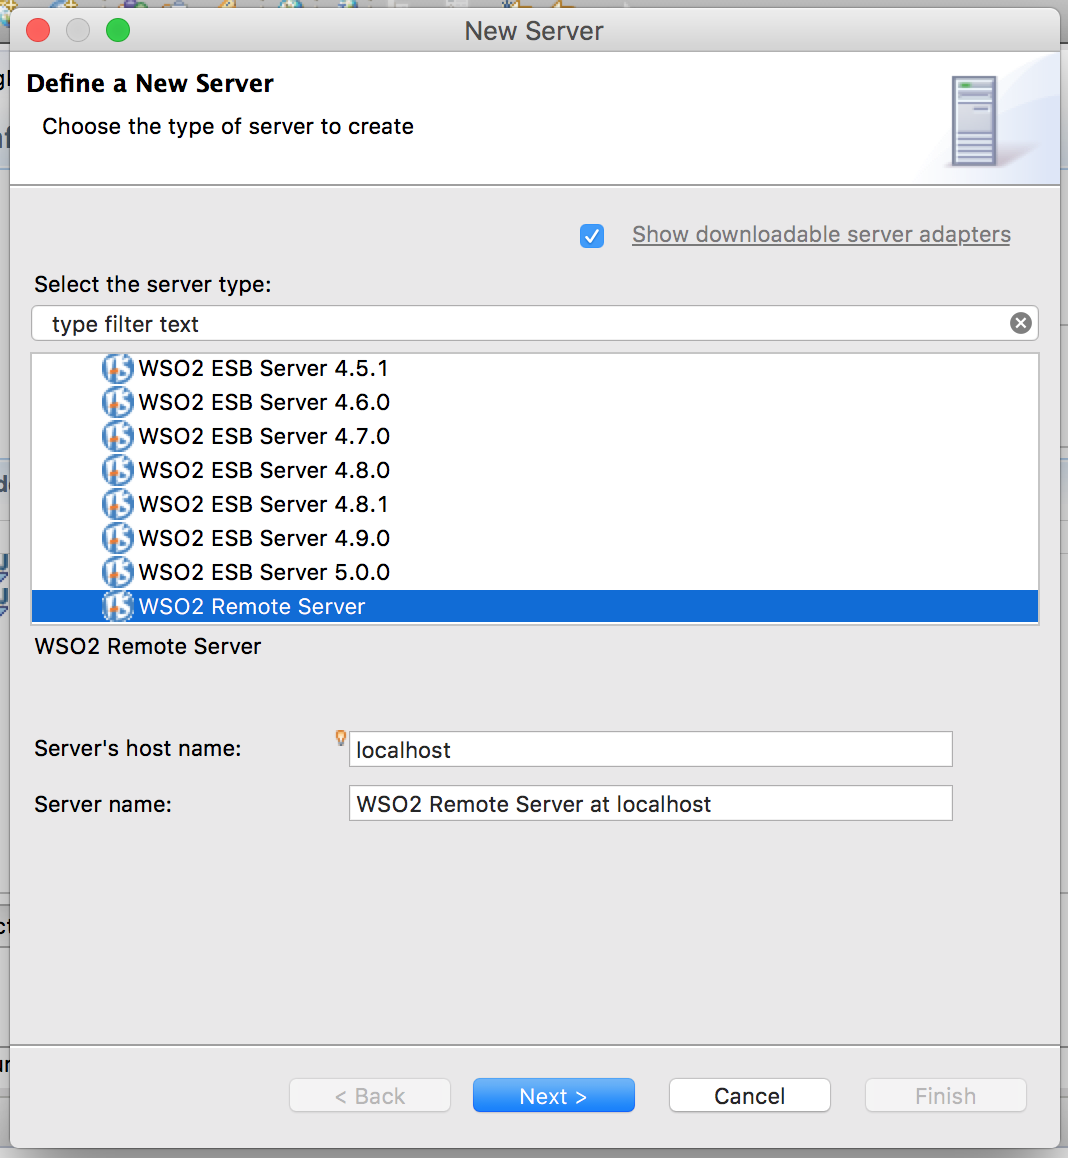
- Give the server URL and click Finish.

- Right click on the server and Select ‘Add and Remove’

- Add the C-App and click Finish.

Now you can see successful log message.
- Login to ESB
- Main menu -> Services

- Click on Try this service -> Send.
You will see the following log message. Which will show the ‘queryLocator’ value, before and after. At the end that value will get blank (means all the records are retrieved).
[Note: Your Salesforce Account need to have at least more than 200 records. Otherwise it’ll stop from the first batch request and the log will not appear. This code will work for the records below 200 but, it’s not the real use case]
[Note: You may run into some read timeout exception, don’t worry.]

Now let’s write the sequence to send those data to the service.
- Right click on the ESB Config project -> New -> Sequence.

- Create new sequence.

- Give a name - > Finish.

Implementing Sequence.
We need to create a body type as below. (Snapshot from ESB try it)

First replace the default code with the following.
<?xml version="1.0" encoding="UTF-8"?>
<sequence name="SF_Data_Sequence" trace="disable" xmlns="http://ws.apache.org/ns/synapse">
<enrich>
<source clone="true" type="body"/>
<target property="INIT_MSG_PAYLOAD" type="property"/>
</enrich>
<payloadFactory media-type="xml">
<format>
<p:insert_SF_Account_operation_batch_req xmlns:p="http://ws.wso2.org/dataservice"/>
</format>
<args/>
</payloadFactory>
<!-- Creating a property called DB_BATCH_MSG_PAYLOAD with the root element expression -->
<property expression="//p:insert_SF_Account_operation_batch_req" name="DB_BATCH_MSG_PAYLOAD" scope="operation" type="OM" xmlns:ns="http://org.apache.synapse/xsd" xmlns:p="http://ws.wso2.org/dataservice"/>
<enrich>
<source clone="true" property="INIT_MSG_PAYLOAD" type="property"/>
<target type="body"/>
</enrich>
<!-- Let's iterate through the data, we can iterate through records -->
<iterate continueParent="true" expression="//rec:records" sequential="true" xmlns:ns="http://org.apache.synapse/xsd" xmlns:rec="urn:partner.soap.sforce.com">
<target>
<sequence>
<property expression="get-property('operation','DB_BATCH_MSG_PAYLOAD')" name="DB_BATCH_MSG_PAYLOAD" scope="default" type="OM"/>
<log level="full"/>
<enrich>
<source clone="true" type="body"/>
<target property="DB_MSG_PAYLOAD" type="property"/>
</enrich>
<property expression="//p:insert_SF_Account_operation" name="DB_MSG_PAYLOAD" scope="default" type="OM" xmlns:p="http://ws.wso2.org/dataservice"/>
<enrich>
<source clone="true" property="DB_BATCH_MSG_PAYLOAD" type="property"/>
<target type="body"/>
</enrich>
<enrich>
<source clone="true" property="DB_MSG_PAYLOAD" type="property"/>
<target action="child" xmlns:p="http://ws.wso2.org/dataservice" xpath="//p:insert_SF_Account_operation_batch_req"/>
</enrich>
<property expression="//p:insert_SF_Account_operation_batch_req" name="DB_BATCH_MSG_PAYLOAD" scope="operation" type="OM" xmlns:p="http://ws.wso2.org/dataservice"/>
</sequence>
</target>
</iterate>
<property expression="get-property('operation','DB_BATCH_MSG_PAYLOAD')" name="DB_BATCH_MSG_PAYLOAD" scope="default" type="OM"/>
<enrich>
<source clone="true" property="DB_BATCH_MSG_PAYLOAD" type="property"/>
<target type="body"/>
</enrich>
<log level="full"/>
</sequence>
Now redeploy the project and run the proxy service.

You will see a log like this.
Copy the xml content and save it as an xml file. Which will look like this,

[Note: For some special cases like below, we need to modify that xml by adding some namespaces. It will help the DataMapper to clearly identify the input elements. Therefore, in here I have modify the xml by adding some namespaces.]
SF_Init_Data.xml (input file)
<?xml version='1.0' encoding='utf-8'?>
<soapenv:Header>
<axis2ns11:LimitInfoHeader xmlns:axis2ns11="urn:partner.soap.sforce.com">
<axis2ns11:limitInfo>
<axis2ns11:current>42336</axis2ns11:current>
<axis2ns11:limit>83000</axis2ns11:limit>
<axis2ns11:type>API REQUESTS</axis2ns11:type>
</axis2ns11:limitInfo>
</axis2ns11:LimitInfoHeader>
</soapenv:Header>
<soapenv:Body>
<axis2ns11:records xmlns:axis2ns11="urn:partner.soap.sforce.com" xmlns:xsi="http://www.w3.org/2001/XMLSchema-instance"
xsi:type="sf:sObject">
<sf:type xmlns:sf="urn:sobject.partner.soap.sforce.com">Account</sf:type>
<sf:Id xmlns:sf="urn:sobject.partner.soap.sforce.com">001E0000002SFO2IAO</sf:Id>
<sf:CreatedDate xmlns:sf="urn:sobject.partner.soap.sforce.com">2011-03-15T00:15:00.000Z</sf:CreatedDate>
<sf:Id xmlns:sf="urn:sobject.partner.soap.sforce.com">001E0000002SFO2IAO</sf:Id>
<sf:Name xmlns:sf="urn:sobject.partner.soap.sforce.com">WSO2</sf:Name>
</axis2ns11:records>
</soapenv:Body>
</soapenv:Envelope>
Also create the format which need by the DSS service.
[Note: As in the previous step you can get the body content from the ‘Try service’ in DSS. Also make sure you have add the namespaces]
Then save it as a xml file.
SF_DSS_Format.xml (output file)
<soapenv:Header>
<axis2ns11:LimitInfoHeader xmlns:axis2ns11="urn:partner.soap.sforce.com">
<axis2ns11:limitInfo>
<axis2ns11:current>9912</axis2ns11:current>
<axis2ns11:limit>83000</axis2ns11:limit>
<axis2ns11:type>API REQUESTS</axis2ns11:type>
</axis2ns11:limitInfo>
</axis2ns11:LimitInfoHeader>
</soapenv:Header>
<soapenv:Body>
<!--1 or more occurrences-->
<xs:insert_SF_Account_operation>
<!--Exactly 1 occurrence-->
<xs:AccountId>?</xs:AccountId>
<!--Exactly 1 occurrence-->
<xs:Name>?</xs:Name>
<!--Exactly 1 occurrence-->
<xs:CreatedDate>?</xs:CreatedDate>
<!--Exactly 1 occurrence-->
<xs:year>?</xs:year>
<!--Exactly 1 occurrence-->
<xs:Month>?</xs:Month>
<!--Exactly 1 occurrence-->
<xs:Date>?</xs:Date>
</xs:insert_SF_Account_operation>
</xs:insert_SF_Account_operation_batch_req>
</soapenv:Body>
</soapenv:Envelope>
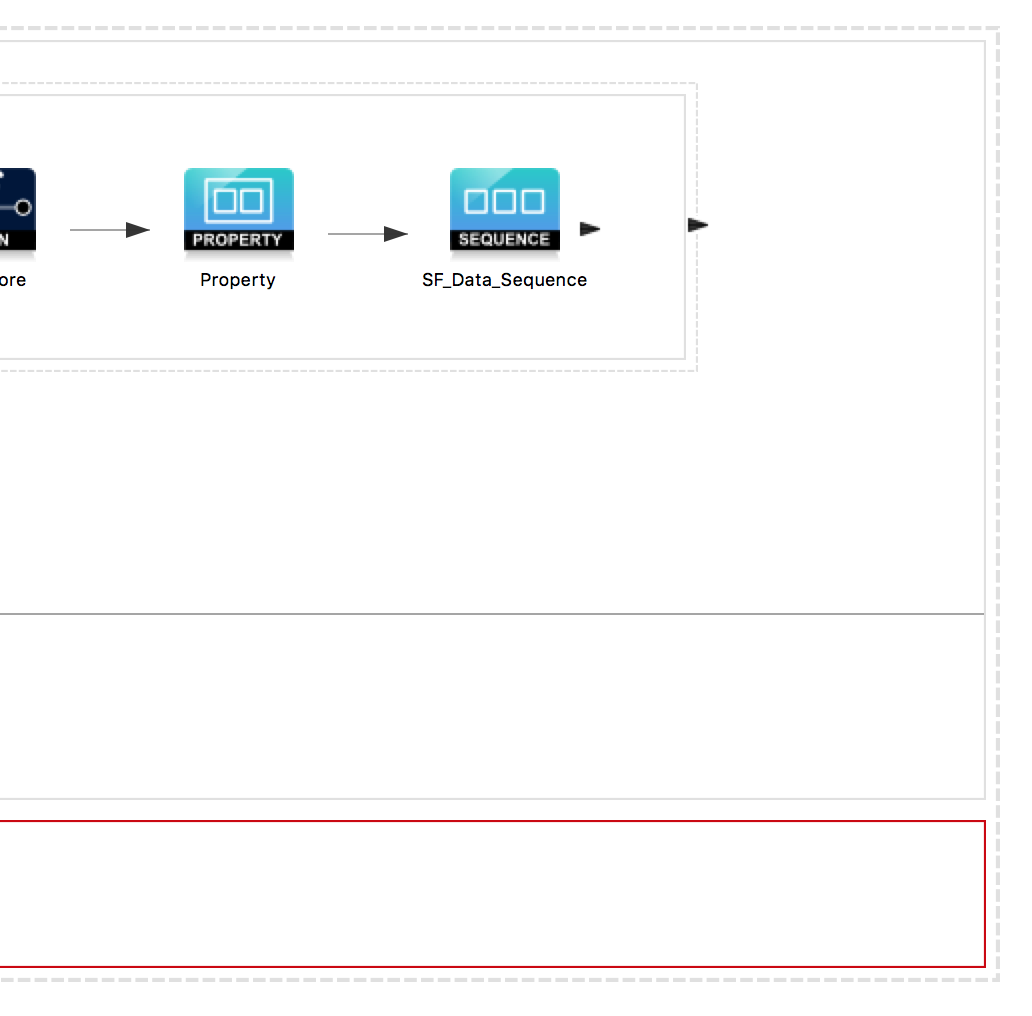
Now go to design view of the created sequence in the tooling.
Drag and drop the ‘DataMapper’ Mediator in between the property and enrich mediators as below.

- Double click on the DataMapper mediator and give a Name.
- Select the registry project - > ok.

You will get the following window.

Right click on the Input panel ‘Load Input’.

Browse the SF_Init_Data.xml file and click ok.
You will see the following window now.

Let’s add the output message type.
Right click on the Input panel ‘Load Output’.

Browse the xml file, SF_DSS_Format.xml click ok.
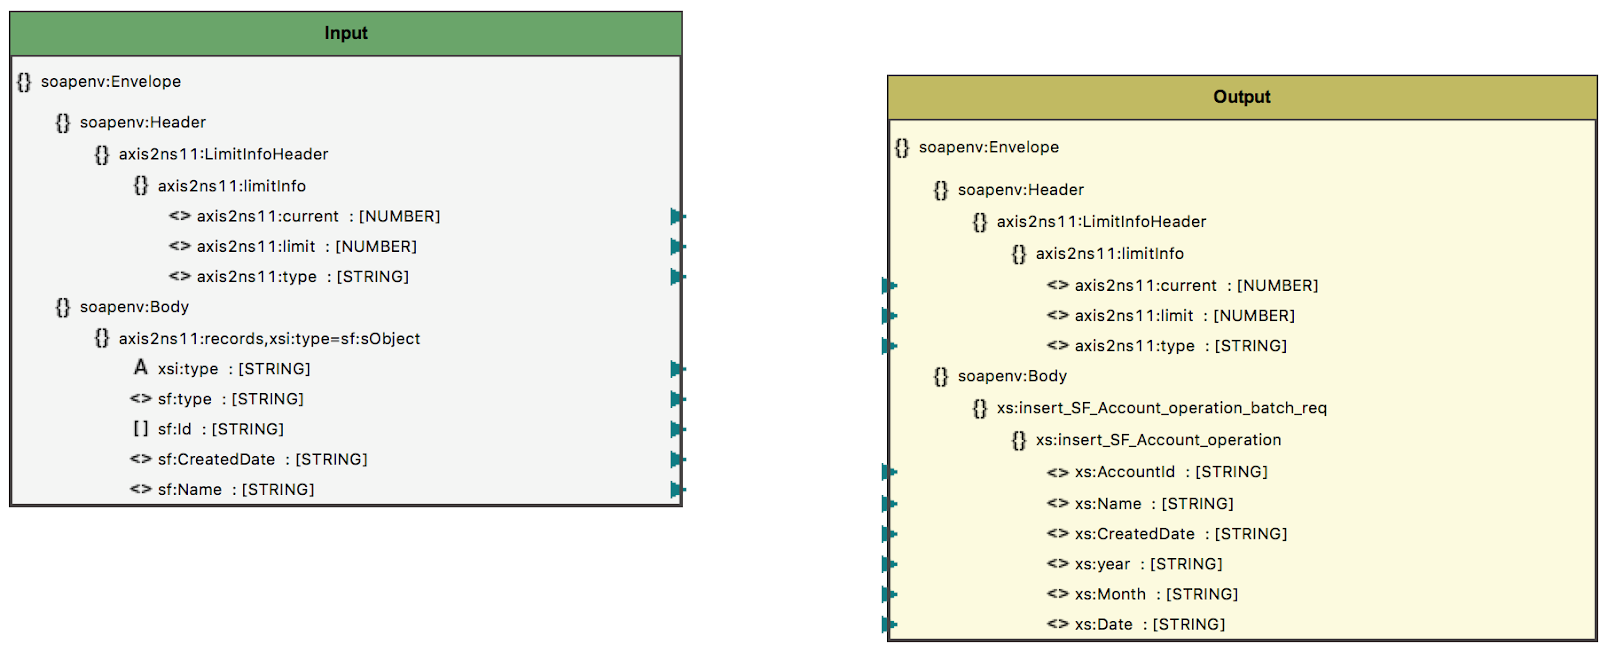
Let’s do the Mapping part.
What I need to do here. I need store following created date separated into Year, Month and Date.
[Note: This is not limited to the Account object. In any organization getting Annual, Monthly and Quarterly...etc, data is very useful for data analytics. Which can be applied to Opportunities, Leads, Products or any other correlation analysis]
2011-03-15T00:15:00.000Z
First let’s split it by ‘T’,
Drag and drop the ‘Split’ operation into the window from the left operation menu.
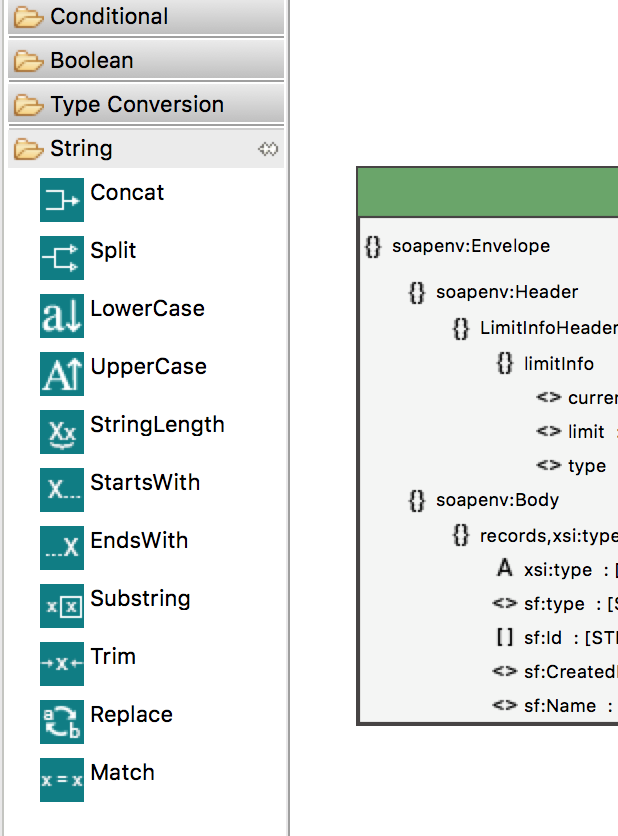
Click and drag the arrow head of the Created Date as the Input string to the split operation.

Right click on the split operation and select Configure Split Operation.

Give the number of outputs as 2 and Split Delimiter as ‘T’.
Click ok.

Which will give you 2011-03-15 and 00:15:00.000Z.
[We need the left side String.]
- Drag and drop another Split operation.
- Map the left side string as the Input string to the next Split operator.
- Configure it to split by Delimiter ‘-’ and 3 output parameters.

Now It will look like this. Which will separate 2011-03-15 into 2011 , 03 and 15

Let’s map the output strings to Year, Month and Date as the input values to the Output.
Drag the arrow heads from the Split operator and point them to appropriate output.
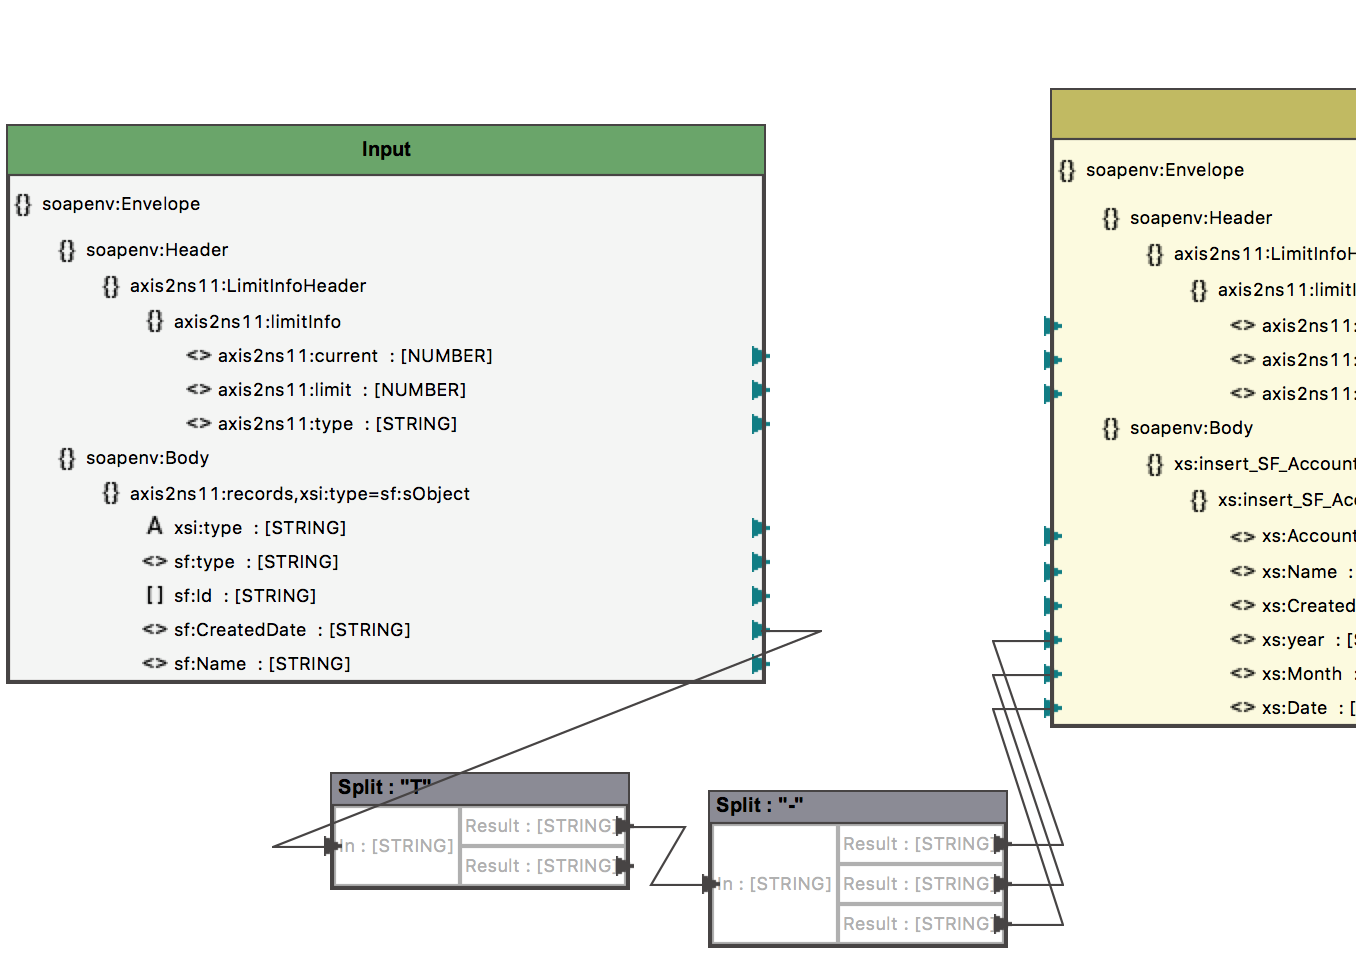
Now map the other variable’s as well.

Now all are complete.
At the end of the day you proxy should look like this. (Parts are separated for better view)

Proxy code.
<?xml version="1.0" encoding="UTF-8"?>
<proxy name="SF_Proxy" startOnLoad="true" transports="http https" xmlns="http://ws.apache.org/ns/synapse">
<target>
<inSequence>
<salesforce.query configKey="sf_auth">
<batchSize>10</batchSize>
<queryString>SELECT CreatedDate,Id,Name FROM Account</queryString>
</salesforce.query>
<sequence key="SF_Data_Sequence"/>
<enrich>
<source clone="true" property="INIT_MSG_PAYLOAD" type="property"/>
<target type="body"/>
</enrich>
<iterate expression="//sfdc:iterator" id="" sequential="true" xmlns:sfdc="http://wso2.org/salesforce/adaptor">
<target>
<sequence>
<property expression="get-property('operation','opt.salesforce.query.queryLocator')" name="salesforce.query.queryLocator" scope="default" type="STRING"/>
<salesforce.queryMore>
<batchSize>200</batchSize>
</salesforce.queryMore>
<property expression="//ss:queryMoreResponse//ss:queryLocator" name="opt.salesforce.query.queryLocator" scope="operation" type="STRING" xmlns:soapenv="http://schemas.xmlsoap.org/soap/envelope/" xmlns:ss="urn:partner.soap.sforce.com"/>
<sequence key="SF_Data_Sequence"/>
</sequence>
</target>
</iterate>
</inSequence>
<outSequence>
<send/>
</outSequence>
<faultSequence/>
</target>
</proxy>
And the sequence should looks like this (Parts are separated for better view).


Sequence code.
<?xml version="1.0" encoding="UTF-8"?>
<sequence name="SF_Data_Sequence" trace="disable" xmlns="http://ws.apache.org/ns/synapse">
<enrich>
<source clone="true" type="body"/>
<target property="INIT_MSG_PAYLOAD" type="property"/>
</enrich>
<payloadFactory media-type="xml">
<format>
<p:insert_SF_Account_operation_batch_req xmlns:p="http://ws.wso2.org/dataservice"/>
</format>
<args/>
</payloadFactory>
<!-- Creating a property called DB_BATCH_MSG_PAYLOAD with the root element expression -->
<property expression="//p:insert_SF_Account_operation_batch_req" name="DB_BATCH_MSG_PAYLOAD" scope="operation" type="OM" xmlns:ns="http://org.apache.synapse/xsd" xmlns:p="http://ws.wso2.org/dataservice"/>
<enrich>
<source clone="true" property="INIT_MSG_PAYLOAD" type="property"/>
<target type="body"/>
</enrich>
<!-- Let's iterate through the data, we can iterate through records -->
<iterate continueParent="true" expression="//rec:records" sequential="true" xmlns:ns="http://org.apache.synapse/xsd" xmlns:rec="urn:partner.soap.sforce.com">
<target>
<sequence>
<property expression="get-property('operation','DB_BATCH_MSG_PAYLOAD')" name="DB_BATCH_MSG_PAYLOAD" scope="default" type="OM"/>
<datamapper config="gov:datamapper/SFConfig.dmc" inputSchema="gov:datamapper/SFConfig_inputSchema.json" inputType="XML" outputSchema="gov:datamapper/SFConfig_outputSchema.json" outputType="XML"/>
<enrich>
<source clone="true" type="body"/>
<target property="DB_MSG_PAYLOAD" type="property"/>
</enrich>
<property expression="//p:insert_SF_Account_operation" name="DB_MSG_PAYLOAD" scope="default" type="OM" xmlns:p="http://ws.wso2.org/dataservice"/>
<enrich>
<source clone="true" property="DB_BATCH_MSG_PAYLOAD" type="property"/>
<target type="body"/>
</enrich>
<enrich>
<source clone="true" property="DB_MSG_PAYLOAD" type="property"/>
<target action="child" xmlns:p="http://ws.wso2.org/dataservice" xpath="//p:insert_SF_Account_operation_batch_req"/>
</enrich>
<property expression="//p:insert_SF_Account_operation_batch_req" name="DB_BATCH_MSG_PAYLOAD" scope="operation" type="OM" xmlns:p="http://ws.wso2.org/dataservice"/>
</sequence>
</target>
</iterate>
<property expression="get-property('operation','DB_BATCH_MSG_PAYLOAD')" name="DB_BATCH_MSG_PAYLOAD" scope="default" type="OM"/>
<enrich>
<source clone="true" property="DB_BATCH_MSG_PAYLOAD" type="property"/>
<target type="body"/>
</enrich>
<header name="Action" scope="default" value="urn:insert_SF_Account_operation_batch_req"/>
<call>
<endpoint>
<address uri="http://localhost:8679/services/SF_Data_Service"/>
</endpoint>
</call>
</sequence>
Now if you run you proxy service you will see Salesforce Account data in you database.
[Note if you are going to schedule it please use INSERT ... ON DUPLICATE KEY UPDATE in the data services]
Example: INSERT INTO table (id, name, age) VALUES(1, "A", 19) ON DUPLICATE KEY UPDATE name="A", age=19
[Note: From the next article, let’s try to understand about creating a connector. If it is not available in the connector store]
References:
Also you can find some interesting articles about ESB Tooling on Palle’s blog. And some technological facts in Rjith’s blog.


This comment has been removed by the author.
ReplyDeleteSuperb article... Saved my time and learned a lot.
ReplyDeleteThank you for sharing.
Great blog. Livewire has also been engaged in Automation and Artifical Intelligence, and Application Development across multiple platforms for various industries especially in the medical industry.
ReplyDeleteThank you for sharing such a useful article. I had a great time. This article was fantastic to read. Continue to publish more articles on
ReplyDeleteData Engineering Services